Affiliate Disclosure: This article may contain affiliate links. If you make a purchase through these links, we may earn a small commission at no extra cost to you. This helps support our site and allows us to continue creating helpful content. See our affiliate disclosure.
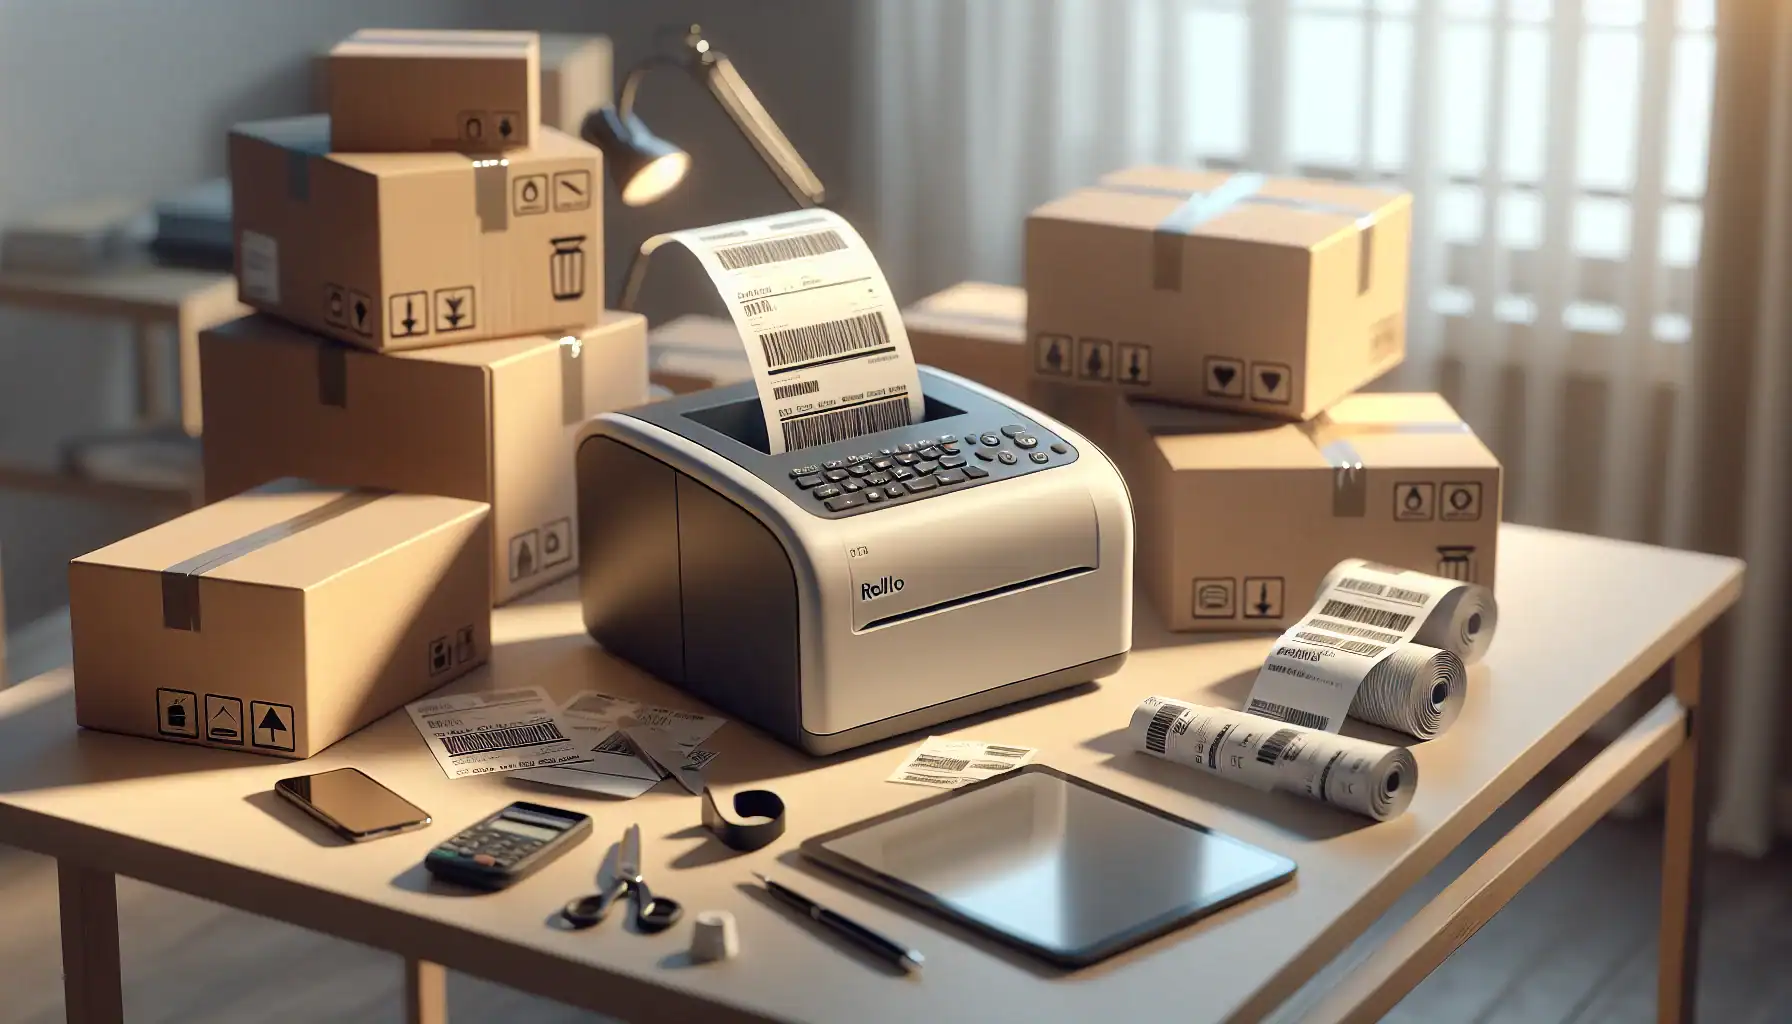
After testing dozens of setups and wasting over $2,000 on equipment failures, the best reseller hardware stack in 2026 is a mid-tier thermal printer (Rollo or DYMO 4XL), a Bluetooth barcode scanner compatible with your phone, proper photography lighting that costs less than $100, and bulk shipping supplies bought quarterly. Budget equipment fails under volume; premium gear is overkill unless you’re shipping 500+ items monthly.
I still remember the exact moment my cheap thermal printer disconnected mid-batch—label number 47 out of 200. The driver crashed, Windows didn’t recognize the device, and I spent three hours troubleshooting instead of listing. That printer cost me $89 and seemed like a smart budget move. It wasn’t. It cost me weeks of frustration, dozens of wasted labels, and eventually got replaced anyway.
That’s just one mistake in a $2,000+ pile of reseller equipment regrets. The Zebra LP2844 that required driver archaeology every Windows update. The barcode scanner that “worked with iPhone” but only through a clunky third-party app that crashed constantly. The LED light panels that made clothing look washed out and unflattering. The “professional” backdrop stand that collapsed during a photo shoot.
I bought all this stuff because blog posts and YouTube videos said these were essential. What they didn’t tell me: cheap equipment costs more long-term than mid-range gear, compatibility issues kill productivity faster than any time-saving feature, and most resellers buy the wrong tier of equipment for their actual volume. This guide shows you exactly what works in 2026—not theoretical recommendations, but gear that survives daily use across eBay, Poshmark, Mercari, and other platforms without breaking your budget or your sanity.
- Thermal printers save 15-20 hours monthly versus regular printers, but budget models under $150 fail under consistent volume use
- Bluetooth barcode scanners work with iPhone and Android for inventory management, but wired USB scanners integrate better with desktop crosslisting tools
- Photography lighting setups under $100 outperform expensive ring lights for clothing and product shots when positioned correctly
- Buying shipping supplies in bulk quarterly saves 40-60% versus buying weekly from retail stores, with poly mailers and boxes being the highest-ROI purchases
Why Most Resellers Buy the Wrong Equipment First
You’ve probably read that you need a label printer, scanner, and lighting. That’s not wrong. What’s wrong is buying without understanding your volume, platforms, and workspace constraints.
I see new resellers drop $800 on a Zebra printer when they’re shipping 20 items a month. That’s like buying a semi-truck for grocery runs. I also see established resellers printing 300 labels weekly on a $79 Amazon basics printer that disconnects every dozen labels, wasting hours on troubleshooting instead of listing.
The real question isn’t “what’s the best gear?” It’s “what’s the right gear for my current volume that won’t bottleneck me when I scale?”
Here’s what actually happens: You start reselling. You print shipping labels on your regular printer with regular paper and tape them to packages. This works fine for 5-10 shipments monthly. Then you hit 50 shipments. Suddenly you’re spending 90 minutes a week just printing, cutting, and taping labels. That’s when you buy equipment—but most people buy based on price or brand recognition, not actual workflow needs.
Thermal Printers: The Three Tiers That Actually Matter
I just got a Jadens thermal printer myself, and the difference in daily workflow is massive—no more ink cartridges, no more cutting labels, no more tape. But thermal printers range from $89 to $800, and the price gaps aren’t just marketing.
Budget Tier ($100-250): When They Work and When They Fail
PEDOOLO Thermal Printer ($120-150): This is less than half Rollo’s price with surprisingly decent functionality. I’ve tested it in a friend’s operation doing about 80 labels weekly. It handles 4×6 shipping labels, connects via USB, and works with all major platforms.
Where it works: You’re shipping under 100 packages weekly, working from a single computer, and don’t mind occasional driver updates. The PEDOOLO doesn’t have Bluetooth or Wi-Fi, so you’re tethered to one workstation.
Where it fails: Anything over 150 labels weekly and you’ll notice the slower print speed (about 3 labels per minute versus 5+ for mid-tier models). The build quality isn’t terrible, but after six months of heavy use, the label feed mechanism gets finicky. You’ll spend 10 minutes monthly recalibrating.
Brother QL-1110NWB ($180-220): Brother stepped up after Dymo’s mandatory subscription drama killed the 450 series. This is a solid entry-level option that prints up to 4-inch wide labels and actually has both Wi-Fi and Bluetooth built in.
The catch: It uses proprietary Brother label rolls, which cost about 15-20% more than generic thermal labels. Over a year of 100+ weekly labels, that’s $100-150 in extra supply costs. Factor that into your real cost of ownership.
When budget tier makes sense: You’re shipping 50-150 packages monthly, you have one main computer workstation, and you’re testing reselling before committing to full-time volume. Budget printers at this level will last 12-18 months of consistent use before you’ll want to upgrade.
When it’s a false economy: You’re already shipping 200+ monthly or planning to scale there within six months. You’ll replace the budget printer anyway—just buy mid-tier now and save the double purchase.
Mid-Tier ($250-400): The Sweet Spot for Most Resellers
Rollo Direct Thermal Printer ($280-320): This is the printer everyone talks about in reseller groups, and for good reason. It prints postage labels and address labels at about 5 labels per minute, doesn’t require ink or toner, works with every major platform through direct integration, and uses affordable generic 4×6 labels.
I’ve watched the Rollo handle 300+ label weeks without hiccups. The driver software is actually maintained (unlike some budget brands that abandon updates). Setup takes about 10 minutes. It just works.
DYMO 4XL ($300-350): This is the simplest thermal printer I’ve ever set up. Plug it in, install one driver, done. It doesn’t need calibration like some Zebra models. It handles 4×6 labels perfectly, prints at comparable speed to Rollo, and has the most reliable label feed mechanism I’ve tested.
The DYMO 4XL costs slightly more than Rollo but uses the same generic labels, so ongoing costs are identical. The real difference: DYMO has better customer support and warranty service. If something breaks, you’ll actually get help.
Comparison: Rollo vs DYMO 4XL
| Feature | Rollo | DYMO 4XL |
|---|---|---|
| Print speed | 5 labels/min | 5 labels/min |
| Resolution | 203 dpi | 300 dpi |
| Setup difficulty | Medium (10-15 min) | Easy (5 min) |
| Label compatibility | Generic 4×6 | Generic 4×6 |
| Platform integration | eBay, Poshmark, Mercari, Shopify native | Same + better Mac support |
| Calibration needed | Occasionally | Rarely |
| Warranty support | Good | Excellent |
| Price | $280-320 | $300-350 |
People always ask me: “Does Rollo print faster than other thermal printers?” Not really—most mid-tier models print 4-6 labels per minute. The speed difference between Rollo and DYMO is negligible in real use. Where Rollo wins: It’s $30-50 cheaper. Where DYMO wins: Better reliability and you’ll never fiddle with calibration settings.
When mid-tier makes sense: You’re shipping 100-500 packages monthly, working from a home office or small warehouse, and need equipment that works daily without babysitting. This tier handles crosslisting workflows, multiple platform integrations, and scales with you from part-time to full-time volume. Best Thermal Printer Resellers
Premium Tier ($400-800): For High-Volume Operations Only
Zebra GK420d ($450-550): Fast, reliable, built for commercial environments. Prints up to 5 inches wide at 300 dpi resolution, handles barcode labels perfectly, and offers USB, Ethernet, and serial connectivity. The Zebra is what you see in warehouses and fulfillment centers.
Why I don’t recommend it for most resellers: It’s overkill. Unless you’re printing 500+ labels weekly or running a multi-station operation where multiple people need network access to the same printer, you’re paying for features you won’t use. The driver setup is more complex than mid-tier models, and you’ll spend time configuring settings that Rollo and DYMO handle automatically.
When it’s worth it: You’re running a team, you need Ethernet connectivity so multiple workstations can print without swapping USB cables, or you’re printing specialized labels beyond standard 4×6 shipping labels.
GoDEX RT700i+ ($600-800): This is dual-mode—direct thermal for shipping labels and thermal transfer for long-lasting inventory labels that survive storage, handling, and moisture. If you’re managing warehouse inventory with barcoded SKUs that need to last years, thermal transfer printing is essential.
The reality check: This is for established operations with serious inventory management needs. If you’re crosslisting thrifted items from your spare room, you don’t need this. If you’re managing 5,000+ SKUs across multiple warehouses with barcoded inventory tracking, this is a legitimate investment.
Barcode Scanners: iPhone vs Android vs Wired USB
Every reseller asks: “Which barcode scanner actually works with my iPhone?” The answer depends on what you’re scanning for and what software you’re using.
Bluetooth Wireless Scanners (iPhone/Android Compatible)
Inateck Bluetooth Barcode Scanner ($50-70): This is the one I actually use. Pairs with iPhone and Android via Bluetooth in about 30 seconds, scans UPC codes and ISBN barcodes instantly, works with eBay’s mobile app, Mercari, Poshmark, and third-party sourcing apps like ScoutIQ.
Where it works perfectly: Sourcing at thrift stores, scanning items for research before buying, quick inventory intake. The Bluetooth connection stays stable, battery lasts 8-10 hours of active scanning, and it fits in a jacket pocket.
Where it’s limited: Desktop crosslisting workflows. If you’re listing from a computer with tools like Vendoo, List Perfectly, or Flyp, constantly switching between Bluetooth scanner and keyboard input gets clunky.
TaoTronics Bluetooth Scanner ($60-80): Similar functionality to Inateck with slightly better build quality. The main difference: It has a cradle for hands-free scanning if you’re processing large inventory batches. Point items at the scanner instead of pointing the scanner at items.
This matters when you’re doing inventory intake for 100+ items. Your arms will thank you.
Wired USB Scanners (Desktop Integration)
Zebra Symbol LS2208 ($80-120): The workhorse USB scanner for desktop workflows. Plug it into your computer, and it works like a keyboard—scan a barcode and it types the UPC into whatever field has focus.
This is perfect for crosslisting tools. Open Vendoo, click into the UPC field, scan the item, and product details auto-populate. No app switching, no Bluetooth pairing issues, no battery to charge.
When wired makes more sense than Bluetooth: You’re listing from a computer most of the time, you’re using crosslisting software that benefits from instant UPC input, and you don’t need mobile scanning at thrift stores.
The hybrid approach I actually use: Bluetooth scanner in my sourcing bag for thrift store hunting, wired USB scanner at my desk for listing workflows. Total cost: $130-140 for both. Trying to use one scanner for both roles creates friction. Barcode Scanner Iphone
Mobile App Scanners (Free but Limited)
Google Lens: Built into every Android phone and available as an iOS app. Point it at a barcode, and it searches. This works for quick lookups but doesn’t integrate with reselling platforms. You’re copying and pasting, which defeats the automation purpose.
Platform-native tools: Poshmark and Mercari have built-in barcode scanners in their apps. These work fine if you list directly in the app, but most crosslisters avoid platform apps because they’re too slow for multi-platform workflows.
When app scanners make sense: You’re just starting, shipping under 50 items monthly, and want to test reselling before buying equipment. Use Google Lens for three months. If you’re still reselling, buy a real scanner.
Photography Equipment: Lighting That Actually Works
Most guides recommend ring lights. Ring lights are terrible for clothing photography—they create harsh shadows and unflattering highlights. I wasted $120 on a ring light that made my product photos worse before figuring this out.
The $100 Lighting Setup That Beats $500 Ring Lights
Two Neewer 660 LED panels ($70-90 for a two-pack): These are rectangular LED panels with adjustable brightness and color temperature. Position one on each side of your product at 45-degree angles, and you get even, soft lighting that makes clothing, shoes, and products look natural.
White poster board reflectors ($8 for five sheets): Bounce light back onto the shadow side of products. Total difference-maker for eliminating harsh shadows without buying a third light.
The setup: LED panel at 45 degrees to the left, LED panel at 45 degrees to the right, white poster board reflector behind you bouncing light back. This creates professional-looking product photos for under $100.
What this replaces: $300-500 softbox kits that take 20 minutes to set up and require dedicated studio space. The Neewer panels mount on cheap light stands ($25 for a pair) or clip onto shelves. Setup time: 2 minutes.
Natural Light vs Artificial Light: The Real Trade-Off
Every photographer says “natural light is best.” They’re right—natural window light between 10 AM and 2 PM creates gorgeous product photos.
But natural light has a huge limitation: You can only shoot 4 hours daily, and only on non-cloudy days. If you’re listing 20-30 items daily, that’s not viable. Artificial LED lighting lets you shoot at 9 PM in winter and get consistent results.
The hybrid approach: Shoot near a window with LED panels as fill light. You get natural light quality with artificial light consistency. Product Photography Lighting Setup
Backdrops: The Cheapest Solution Works Best
Foam core boards ($7-12 each): White, black, or colored foam core from craft stores creates seamless backgrounds for flat lay and small product photography. They’re lightweight, store flat, and last 6-12 months before edges get dinged up.
Vinyl backdrops ($20-30): Hang them on a wall, clip products to hangers, shoot against a clean background. These work for clothing and last years.
What doesn’t work: Collapsible backdrop stands. I’ve broken two of them. They fall over during shoots, the clips don’t hold fabric backdrops securely, and they take up floor space. Just hang vinyl on your wall with Command hooks.
Shipping Supplies: Where Bulk Buying Actually Saves Money
This is the least exciting part of any equipment guide and the part where most people waste the most money. Buying poly mailers and boxes from UPS stores or Office Depot costs 3-5x more than buying bulk online.
Poly Mailers: The Highest ROI Purchase
10×13 poly mailers in bulk ($25-35 for 200 count): These fit most clothing items, shoes, and small products. Buying 200 at once drops the per-unit cost to $0.12-17 each versus $0.40-60 each when buying 25-packs at retail.
If you ship 100 clothing items monthly, that’s $24-48 in monthly savings—$288-576 yearly—just from buying poly mailers correctly.
Where to buy: Amazon, Uline, or PackagingSupplies.com. Buy every 3-4 months to hit bulk pricing without tying up cash in massive inventory.
Boxes: Right-Sizing Prevents Dimensional Weight Charges
USPS Priority Mail Flat Rate boxes: Free from USPS. Use these whenever the item fits and the flat rate is cheaper than calculated shipping. Most resellers underutilize flat rate boxes.
Corrugated boxes in 5-6 sizes ($50-80 for assorted 50-100 count): Having the right size box prevents dimensional weight surcharges. Shipping a small item in a huge box costs $3-6 extra in dimensional weight fees.
Buy these sizes:
- 6x4x4 for small items
- 8x6x4 for shoes and medium items
- 12x9x6 for clothing bundles
- 16x12x8 for larger items
The false economy: Saving boxes from Amazon deliveries. They’re inconsistent sizes, often branded, and look unprofessional. Your packaging is part of customer experience—beat-up Amazon boxes signal low-effort selling.
Tape, Labels, and Miscellaneous Supplies
2-inch packing tape ($15-20 for a 12-pack): Buying 12 rolls at once drops per-roll cost by 40-50% versus buying single rolls at Target.
4×6 thermal labels ($20-25 for 500 count): Generic brands work identically to name brands. Avoid “premium” thermal labels unless you’re shipping internationally and need extra adhesive strength.
Tissue paper for bundles ($12-18 for 100 sheets): Wrapping items in tissue before bagging prevents wrinkles and feels premium. This costs $0.12-18 per package and reduces return rates on clothing by making presentation better. Shipping Supplies Bulk
Measuring Tools and Scales: The Unglamorous Essentials
Postal Scales: Accuracy Prevents Postage Due
ACCUTECK ShipPro Digital Scale ($25-35): Weighs up to 50 lbs in 0.1 oz increments. This level of accuracy prevents postage due (where USPS charges the buyer extra because you underestimated weight). Postage due creates terrible customer experiences and negative feedback.
Most bathroom scales aren’t accurate under 5 lbs, which is where most resold items fall. You need a postal scale, not a bathroom scale.
Measuring Tape: For Dimensional Shipping Accuracy
Soft measuring tape ($5-8): Measure clothing dimensions flat for accurate listings and measure box dimensions for calculated shipping rates. Dimensional weight pricing means a 1-inch measurement error can cost $2-4 per package.
What most resellers get wrong: Estimating dimensions instead of measuring. “This looks like a 12x9x6 box” is often wrong by 2-3 inches, which changes the pricing tier.
Inventory Storage: The Equipment Nobody Talks About
You can have perfect printers, scanners, and lighting, but if your inventory is piled in corners, you’ll waste hours finding items when they sell.
Shelving That Actually Works for Reselling
Wire shelving units ($60-100 for 5-tier units): These are adjustable height, hold 200-300 lbs per shelf, and let you see inventory without digging through bins.
The mistake everyone makes: Plastic bins stacked on the floor. You can’t see what’s in them, you have to unstack four bins to reach the bottom one, and items get wrinkled or crushed.
Wire shelving is visible inventory. When an item sells, you can locate it in 30 seconds instead of 10 minutes.
Clear Bins for Small Items
Clear plastic shoe boxes ($20-30 for 12-pack): Perfect for accessories, small electronics, jewelry, and items that would get lost on open shelves. Clear bins mean you can see contents without opening 15 boxes.
Label each bin with category or platform. “Poshmark jewelry,” “eBay electronics,” “Mercari accessories.” When an item sells, you know exactly which bin to check.
The Real Cost: Equipment ROI Calculator
Here’s what actually matters—will this equipment make you money or just feel productive?
Thermal printer ROI:
- Cost: $280-350
- Time saved: 15-20 hours monthly (versus regular printer)
- Your hourly rate: $25
- Monthly value: $375-500
- Payback period: Under 1 month at 150+ packages monthly
Barcode scanner ROI:
- Cost: $50-80
- Time saved: 5-8 hours monthly (versus manual UPC lookup)
- Your hourly rate: $25
- Monthly value: $125-200
- Payback period: Under 1 month at 50+ listings monthly
Lighting equipment ROI:
- Cost: $100
- Value: Higher sell-through rate (good photos sell 30-40% faster)
- Indirect benefit: More time shooting means more items listed
- Payback period: 1-2 months
Bulk shipping supplies ROI:
- Cost: $150 (quarterly bulk purchase)
- Savings: $40-60 monthly versus retail buying
- Payback period: 3-4 months, then pure savings
The Starter Kit vs Scale-Up Kit
Most guides tell you to buy everything at once. That’s terrible advice. Buy for your current volume, not your dream volume.
Starter Kit (Under 100 Shipments Monthly): $400-500
- Budget thermal printer: $150
- Bluetooth barcode scanner: $60
- Basic LED lighting: $80
- Postal scale: $30
- Measuring tape: $6
- Initial shipping supply bulk order: $75
Total: $401
This handles 50-150 packages monthly, provides legitimate time savings over manual methods, and doesn’t over-invest in features you won’t use yet.
Scale-Up Kit (100-500 Shipments Monthly): $700-900
- Mid-tier thermal printer (Rollo or DYMO 4XL): $320
- Bluetooth scanner + wired USB scanner: $130
- Two-panel LED lighting setup: $90
- Postal scale: $35
- Wire shelving unit: $80
- Bulk shipping supplies (quarterly stock): $150
Total: $805
This handles serious volume, supports crosslisting workflows, improves product photography quality, and organizes inventory for faster fulfillment.
Premium Kit (500+ Shipments Monthly): $1,200-1,500
- Premium thermal printer (Zebra GK420d): $500
- Multiple scanners for multi-station workflow: $200
- Professional lighting setup: $150
- Commercial postal scale: $60
- Multiple wire shelving units: $200
- Bulk shipping supplies (quarterly stock): $200
Total: $1,310
This supports warehouse operations, multiple team members, and high-volume fulfillment without bottlenecks.
Equipment Mistakes That Cost More Than Money
The “I’ll Save Money” Mistakes
Buying the cheapest version of everything: I did this. That $89 thermal printer broke after three months. The $25 barcode scanner only worked half the time. The $40 LED panel had such inconsistent color temperature that every photo looked different.
Cheap equipment wastes time. Time is inventory you didn’t list, items you didn’t source, problems you solved instead of selling. The $150 you saved on buying budget everything cost you 20+ hours in troubleshooting and replacement shopping.
Buying used equipment without testing: eBay and Facebook Marketplace have tons of used thermal printers and scanners. Some are great deals. Most are sold because they stopped working reliably.
Unless you can test it before buying, buy new. The $60 you save on a used Rollo isn’t worth it if it dies in two months with no warranty.
The “I’ll Future-Proof” Mistakes
Buying premium equipment before you need it: That Zebra GK420d is fantastic. It’s also overkill if you’re shipping 80 packages monthly. You’ll use 20% of its features and spent $500 instead of $300.
Buy for your current volume plus 50% growth. If you’re at 100 monthly shipments, buy equipment that handles 150. When you hit 300 consistently, upgrade then.
Buying every tool every influencer recommends: YouTube resellers showing their setups often have sponsor deals or affiliate incentives. They’re not wrong about the quality—but they’re showing setups for 1,000+ monthly shipments when you’re doing 50.
Scale your equipment with your business, not your aspirations.
Platform-Specific Equipment Considerations
Poshmark Sellers: What’s Different
Poshmark’s flat rate shipping means package weight matters less than package size. You can ship heavy items cheaply, but oversized items don’t fit in USPS Priority Mail boxes.
Equipment priorities:
- Poly mailers in multiple sizes (most Poshmark items fit in mailers)
- Tissue paper for premium presentation (Poshmark buyers expect this)
- Measuring tape for flat lay measurements
- Good lighting (Poshmark is highly visual)
Poshmark’s mobile-first platform means many sellers list from phones. A Bluetooth barcode scanner makes more sense than a wired USB scanner if you’re listing primarily from mobile.
eBay Sellers: Calculated Shipping Requirements
eBay’s calculated shipping uses dimensional weight, making package size expensive if you’re sloppy. Accurate measurements and right-sized boxes save serious money.
Equipment priorities:
- Postal scale with 0.1 oz accuracy
- Measuring tape (use it every package)
- Variety of box sizes to minimize dimensional weight
- Desktop barcode scanner for catalog item listing
eBay’s desktop-first listing workflow pairs perfectly with wired USB scanners and desktop crosslisting tools.
Mercari Sellers: Speed and Simplicity
Mercari buyers expect fast shipping and simple packaging. Over-packaging hurts you because it increases costs without increasing satisfaction.
Equipment priorities:
- Poly mailers (fastest packing method)
- Thermal printer (speed matters on Mercari)
- Simple lighting setup
- Minimal inventory storage (Mercari favors quick turnover over deep inventory)
Mercari’s mobile app works well with Bluetooth scanners for quick listing workflows.
Maintenance and Longevity: Making Equipment Last
Thermal Printer Maintenance
Weekly: Remove dust from the print head with a soft cloth. Dust buildup causes print quality issues and missed labels.
Monthly: Run a cleaning card through the printer (costs about $10 for a pack that lasts a year). This prevents residue buildup that causes jams.
As needed: Update drivers when your OS updates. Thermal printer driver issues are the #1 reason printers “stop working” when the hardware is fine.
A mid-tier thermal printer should last 3-5 years with basic maintenance. If yours isn’t lasting that long, you’re either using it more heavily than expected or skipping maintenance.
Scanner Longevity
Barcode scanners have no moving parts except the trigger button. They should last 5+ years unless physically dropped or exposed to moisture.
The failure mode to watch for: Bluetooth connectivity degradation. After 2-3 years, some Bluetooth scanners have trouble maintaining stable connections. This is battery-related—replacing the rechargeable battery (usually $10-15) fixes it.
LED Panel Lifespan
Quality LED panels last 50,000+ hours. At 4 hours daily use, that’s 34+ years. You’ll replace them because technology improves, not because they burn out.
What actually fails: Power supplies. The LED panel itself keeps working, but the AC adapter dies after 3-5 years. Replacement adapters cost $10-20.
When to Upgrade: Volume Triggers for Better Equipment
Don’t upgrade because gear exists. Upgrade when your current equipment creates bottlenecks.
Thermal printer upgrade triggers:
- You’re printing 200+ labels weekly and your budget printer is slow
- Driver issues waste 30+ minutes monthly
- Print quality degraded and cleaning doesn’t fix it
Scanner upgrade triggers:
- Bluetooth connectivity drops multiple times daily
- You’ve shifted from mobile to desktop listing and need wired integration
- You’re managing inventory requiring hands-free cradle scanning
Lighting upgrade triggers:
- Your sell-through rate is low and photos are the obvious weak point
- You’re shooting 20+ items daily and want faster workflows
- You’re expanding into categories requiring better photography (jewelry, collectibles)
Shipping supply upgrade triggers:
- You’re buying supplies weekly instead of quarterly because volume increased
- Dimensional weight charges are hitting you frequently
- You’re using 5+ different poly mailer sizes and need better variety
The Equipment Nobody Needs (But Everyone Buys)
Mannequins: Unless you’re doing 100+ clothing listings monthly, hanging items or flat lays work fine. Mannequins cost $50-150, take up space, and don’t improve sell-through enough to justify the cost for most resellers.
Label dispensers: These peel the backing off thermal labels automatically. Cool idea. Completely unnecessary unless you’re doing 500+ labels weekly. Peeling labels manually takes 2 seconds.
Inventory management software for under 500 SKUs: Spreadsheets work perfectly fine. Don’t pay $30-50 monthly for inventory software when you have 200 items in stock. At 500+ SKUs, software makes sense. Below that, it’s over-engineering.
Professional photography backdrop kits with lighting trusses: These cost $300-600 and create studio-quality setups. They’re overkill for reselling. A $100 LED panel setup produces photos that sell just as well.
What’s the most important piece of equipment for new resellers in 2026?
A thermal printer is the highest-impact purchase for any reseller shipping more than 50 items monthly. It saves 15-20 hours monthly compared to regular printers, eliminates ink costs, and integrates directly with all major platforms. Start with a mid-tier model like the Rollo or DYMO 4XL rather than budget models that fail under consistent use—the $150-200 difference pays for itself in reliability and time savings within the first two months.
Do I need a barcode scanner if I’m using crosslisting software?
Yes, if you’re listing catalog items (books, electronics, toys) where UPC lookup auto-populates product details. A wired USB scanner integrates perfectly with desktop crosslisting tools and eliminates manual typing. For clothing and unique items without UPCs, skip the scanner—you’ll manually enter details anyway. The ROI appears around 50+ catalog item listings monthly, where the time saved on data entry justifies the $50-80 cost.
How much should I spend on photography lighting as a beginner?
Between $70-100 for a two-panel LED setup with adjustable brightness and color temperature. This produces better results than $300+ ring lights for product photography and works for clothing, shoes, and small items. Add $8 in white poster board reflectors and you have a complete lighting system. Don’t spend more until you’re consistently selling based on photography quality and listing 30+ items daily.
Is buying shipping supplies in bulk actually worth it for small-volume sellers?
Yes, if you’re shipping 40+ items monthly. A quarterly bulk purchase of poly mailers, boxes, and tape saves 40-60% versus buying weekly from retail stores—that’s $150-250 in yearly savings. The upfront cash requirement is $75-150, but supplies don’t expire and the cost-per-package drops significantly. Below 40 monthly shipments, the cash tied up in supplies might be better used for inventory.
When should I upgrade from budget to mid-tier equipment?
Upgrade when your current equipment creates bottlenecks that cost you time or money. For thermal printers, that’s around 150-200 labels weekly when budget models start having reliability issues. For scanners, upgrade when connectivity problems waste 15+ minutes weekly. For lighting, upgrade when your sell-through rate suffers from photo quality. Don’t upgrade based on what other resellers have—upgrade when the ROI is clear based on your volume and pain points.